UK E-VISA GUIDEStep-by-Step Digital Visa Application Guide (2026)
Last Updated: July 2026
This comprehensive guide was prepared by e-Kolay Vize experts to explain the step-by-step process of opening a UK e-Visa and UKVI account according to the 2026 rules. The shared information is directly based on official UK sources (GOV.UK). While all official procedures in the system are performed via GOV.UK, as e-Kolay Vize, we provide professional consultancy at every step to ensure you complete the process flawlessly and without errors.
What Exactly is a UK e-Visa?
A UK e-Visa is an entirely digital visa status that replaces the traditional printed visa stickers affixed to passports. From the moment your application is approved, you are required to create a UKVI account in your own name, view your e-Visa from this account, and generate a "share code" to share it with authorities. As of February 25, 2026, the vast majority of new UK visa applications will not be issued a physical sticker in the passport; your visa status will only be tracked on digital platforms.
The digital status tracking system, which was used only for student visas and residence permits for many years, has now become applicable to tourist and non-immigrant standard visas as well. Through this innovation introduced by the UK government, you are able to manage your approved visa, entry rights, and travel permissions online in a highly secure manner.
An Important Detail
The UK e-Visa is not a brand new visa application made from scratch: It is the process of digitally linking your visa to your profile, performed after your visa has been approved.
This application allows your approved UK visa to be reflected in your online account within the UK database. Once you successfully register for the e-Visa system, your travel information is automatically recorded in your profile, you can update personal details directly via the dashboard, and securely share your code with border police when necessary.
BRP Card Expiring or Travelers with an Existing Visa: What Should They Do?
If you live in the UK and your BRP (Biometric Residence Permit) card expires on December 31, 2024, or in 2025, you must create your e-Visa account (UKVI), which replaces the BRP, to prove your status. BRP cards are becoming a thing of the past, and transitioning to the next-generation digital verification system (eVisa) is mandatory.
If you currently have a valid, physical (sticker) UK tourist visa in your passport, you can continue to use it for your travels without any problems. Since your physical visas remain valid, there is no need for an urgent UKVI process.
However, for passengers who wish to do so, it is highly beneficial to register their printed visas in the e-Visa platform to minimize minor time losses during customs clearance. This way, all your records are added to the digital database, and you can expedite your entry by generating a share code at the border.
What is the Difference Between UK eVisa and ETA?
There are two concepts that are often confused on search engines: UK ETA and UK eVisa.
- eVisa (UKVI Account): As explained in this guide, it is a digital visa status used by those who already have an approved UK visa or a BRP residence card to transition their status to digital. This is the process all Turkish citizens must complete after obtaining a visa.
- ETA (Electronic Travel Authorisation): It is a simple pre-flight electronic travel authorization obtained by individuals who have visa-free travel rights to the UK (e.g., citizens of Europe or Gulf countries). Since citizens of the Republic of Turkey are subject to visas, they do not obtain an ETA; they apply for a standard visa and then transition to the eVisa account (UKVI) after approval.
UKVI Account (e-Visa) Setup Process
Initial Stage (Computer)
To complete the process as smoothly as possible, we strongly recommend starting your registration on your computer first and switching to your mobile phone during the subsequent identity scanning stages.
Verification Stage (Phone)
To scan your passport chip, your phone must be NFC-enabled and turned on. The minimum operating system requirements are iOS 16 or Android 8.0.
First, visit the official page gov.uk/evisa/set-up-ukvi-account. Start the process by clicking the Create a UKVI account button on the screen that appears.
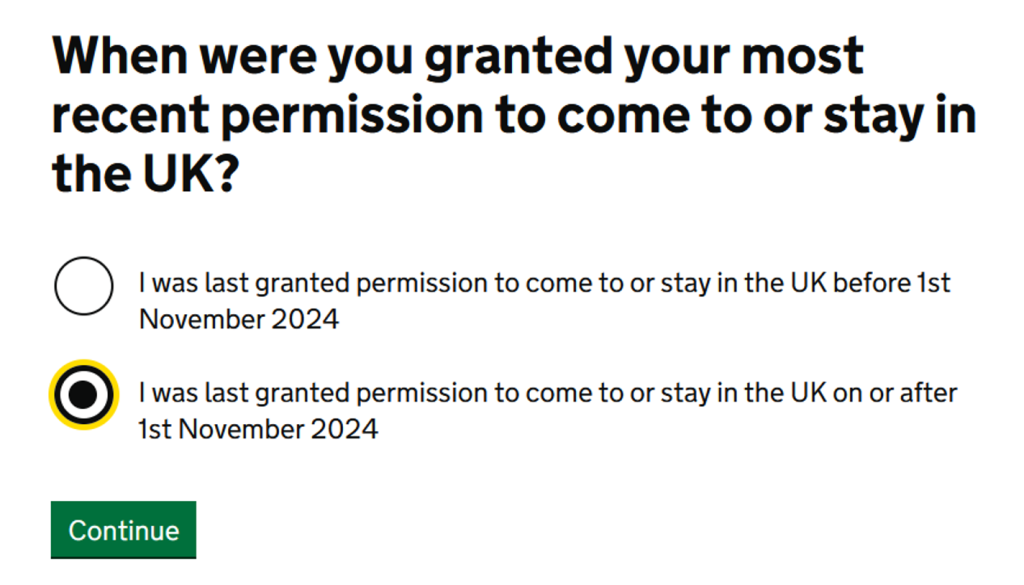
The system will ask for the issue date of your current visa. Those who obtained their visa after November 2024 should select the second option and click Continue:
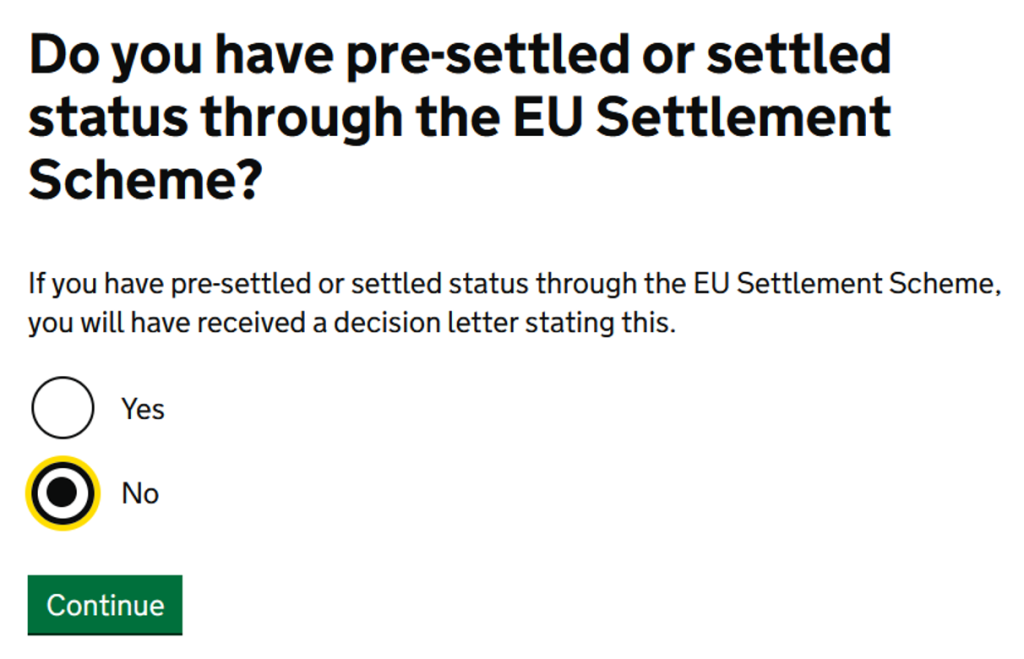
Next, it will inquire whether you have a residence permit in the UK. If it's a short-term (tourist/visitor etc.) visa, you do not have residency; you can proceed by selecting No:
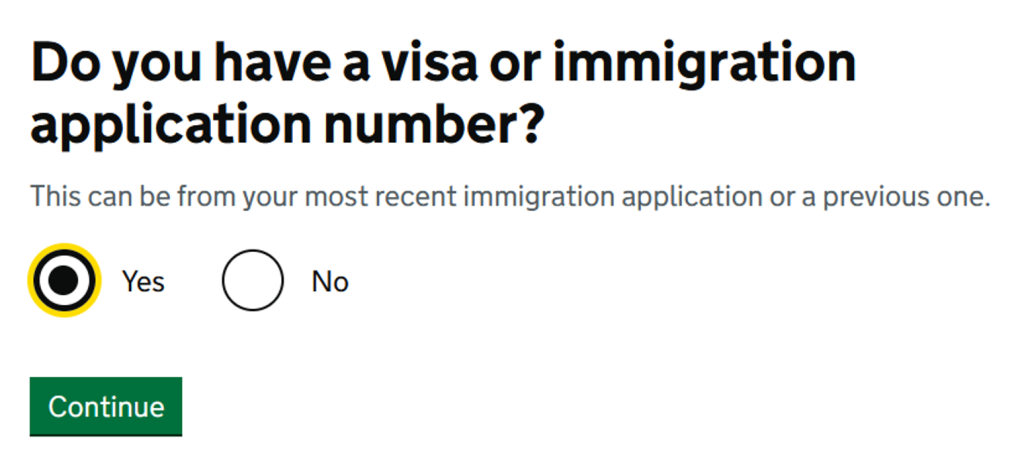
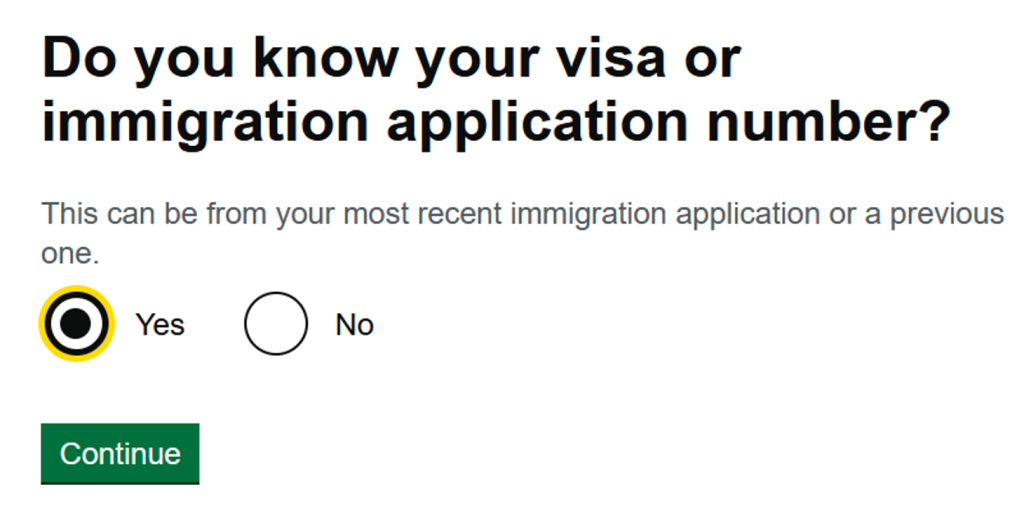
It will want to confirm whether you have a visa application number. Check the Yes option here and proceed with Continue:
Following these steps, you will be redirected to the main registration form of the UKVI system. Click the Start now button to transition to the form stage:
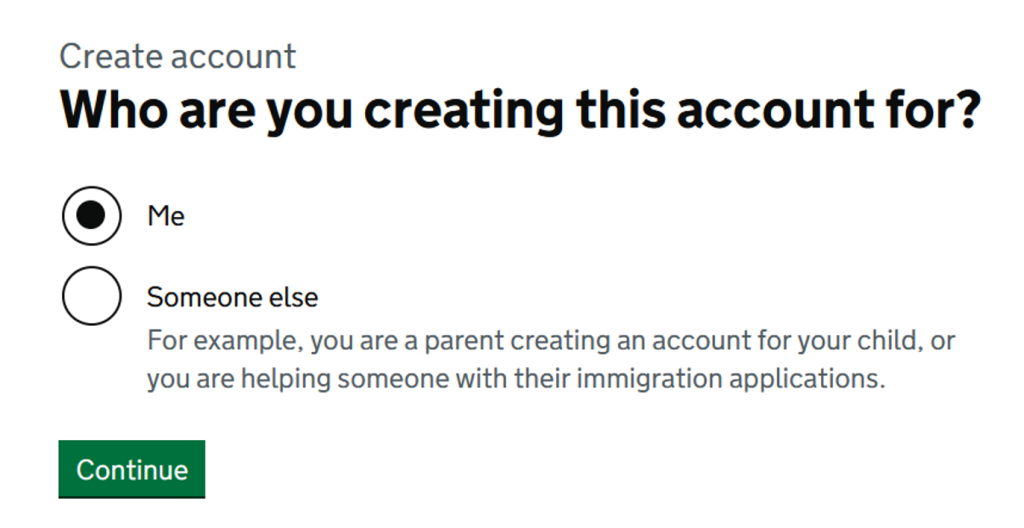
Here you must select for whom you are completing the application process. Since you are creating your own registration, check Myself to continue:
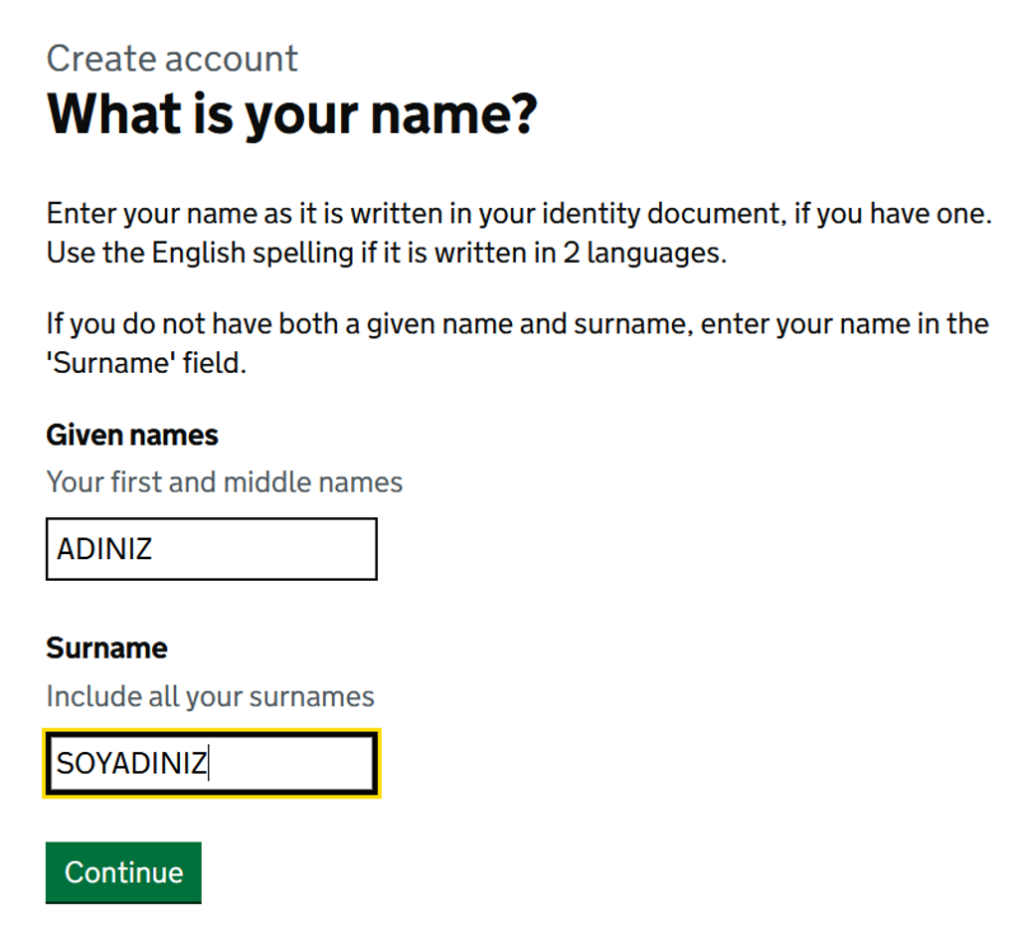
Fill in your first and last name exactly as they appear on your passport, using capital letters without Turkish characters (e.g., SUKRU CELIK instead of ŞÜKRÜ ÇELİK):
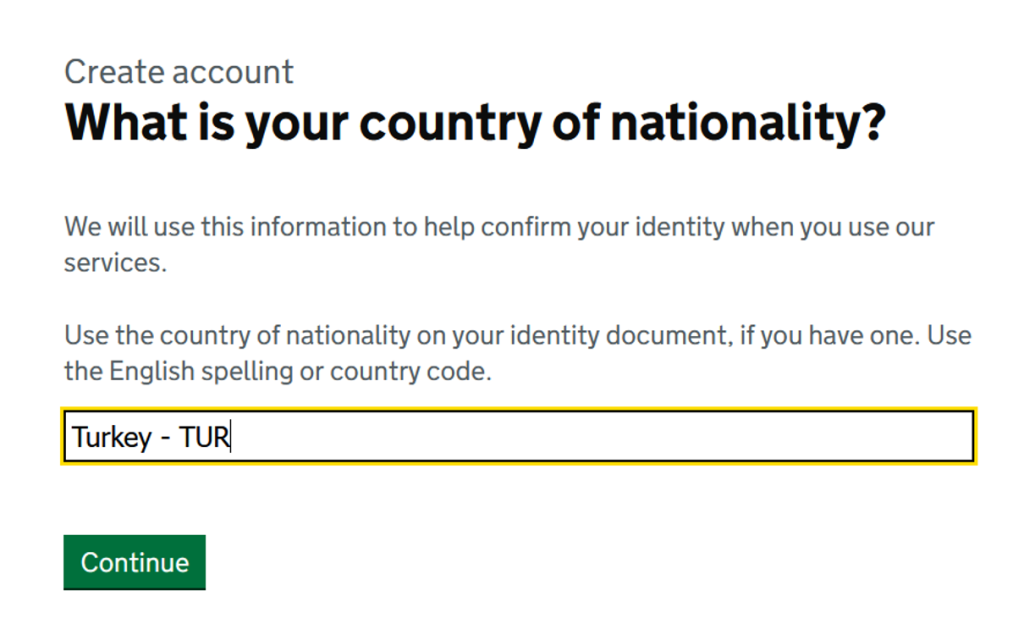
When asked for the country of citizenship, if you type TUR into the box, Turkey will automatically appear. Select it and proceed:
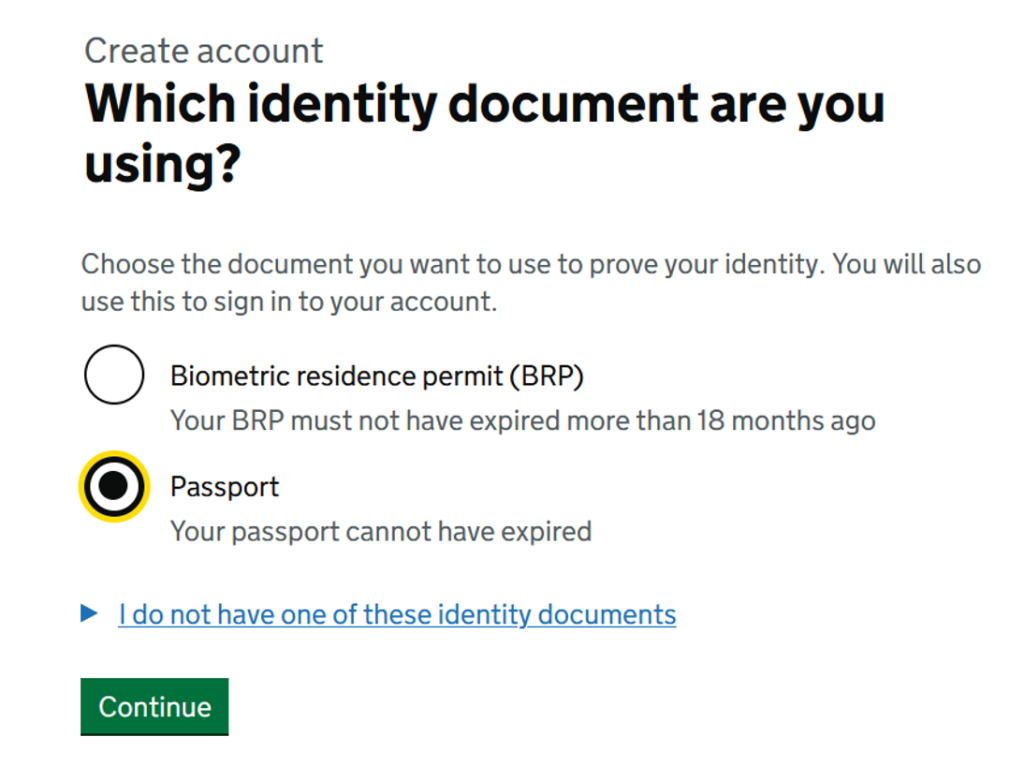
You will be asked what you will use for identity verification. Since we will proceed with our passport, let's select Passport and click continue:
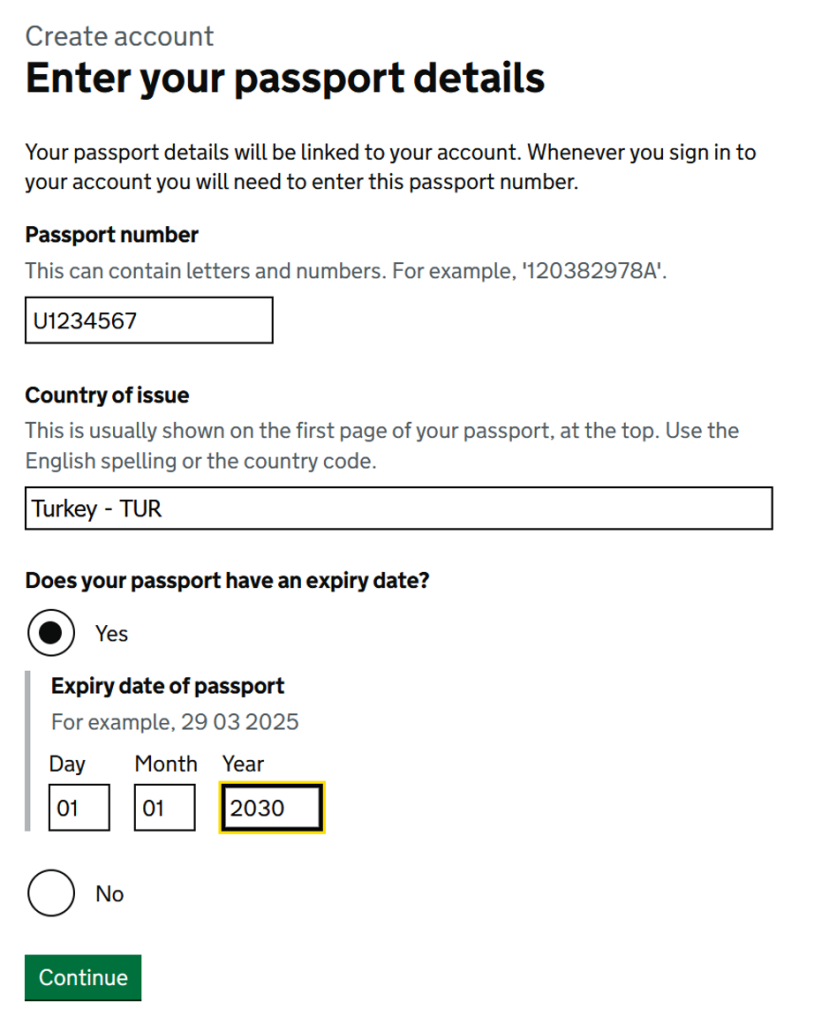
Enter your passport number (along with the letter U at the beginning, like U1234567), and select your country from the "Country of Issue" section. Say YES to the question below, completely enter your passport's expiration date, and confirm:
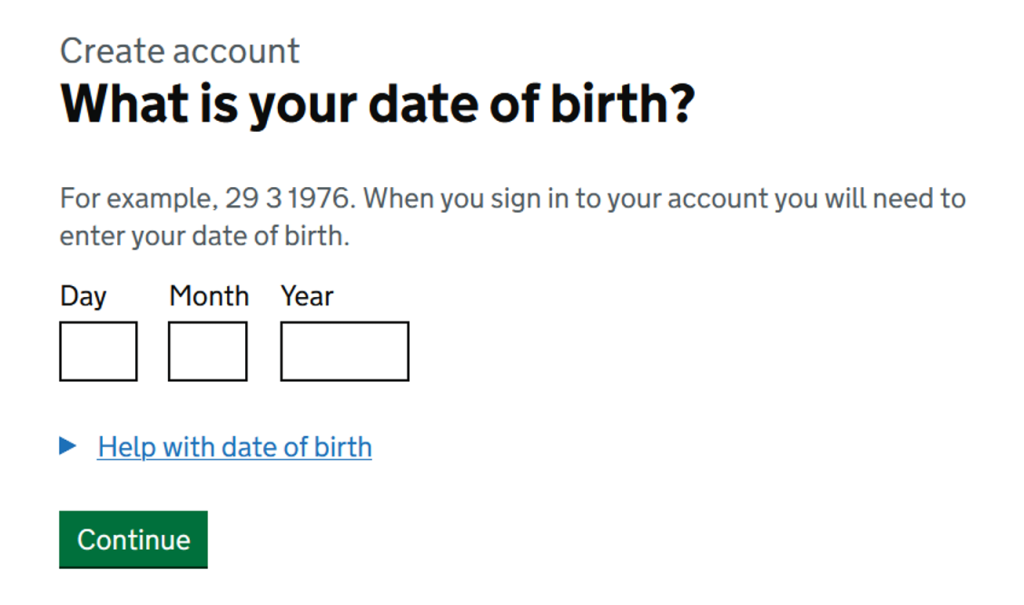
Accurately type your date of birth in the day, month, and full year format:
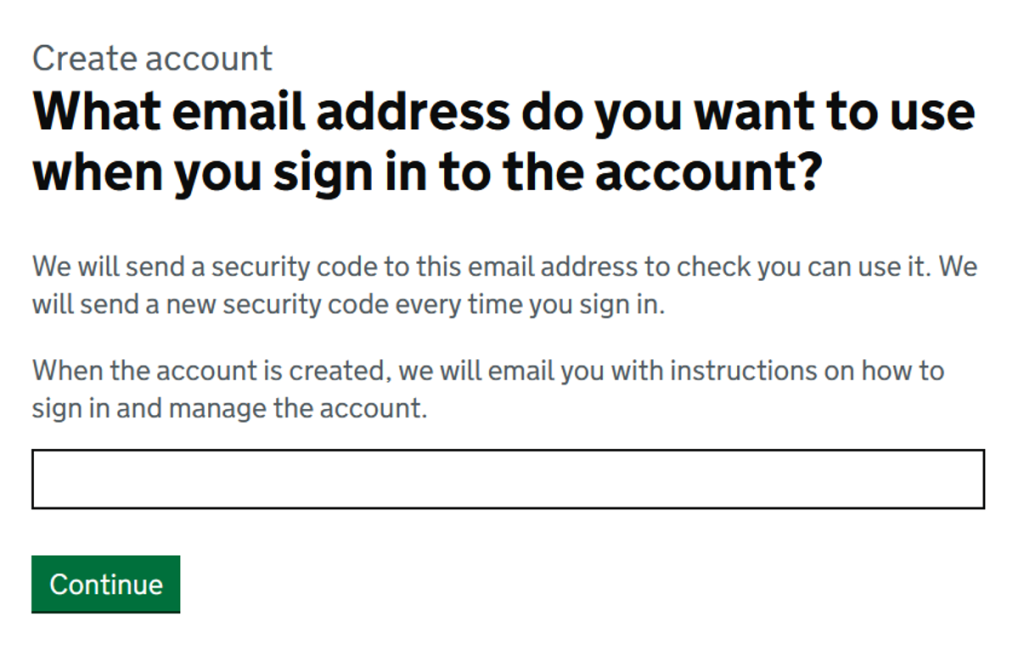
Make sure to enter an active email address that you regularly check and have the password for, so they can contact you:
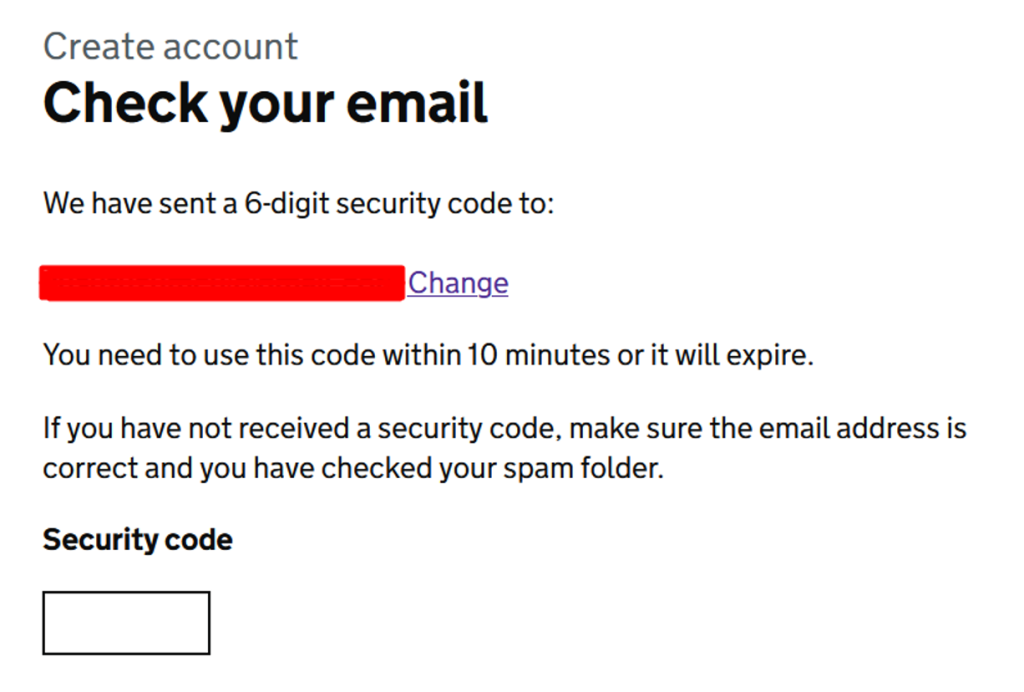
Copy the verification code that will be sent to your email address instantly and paste it into the relevant box:
To ensure they can reach you when necessary, enter your own mobile phone number starting with +90 in the correct format:
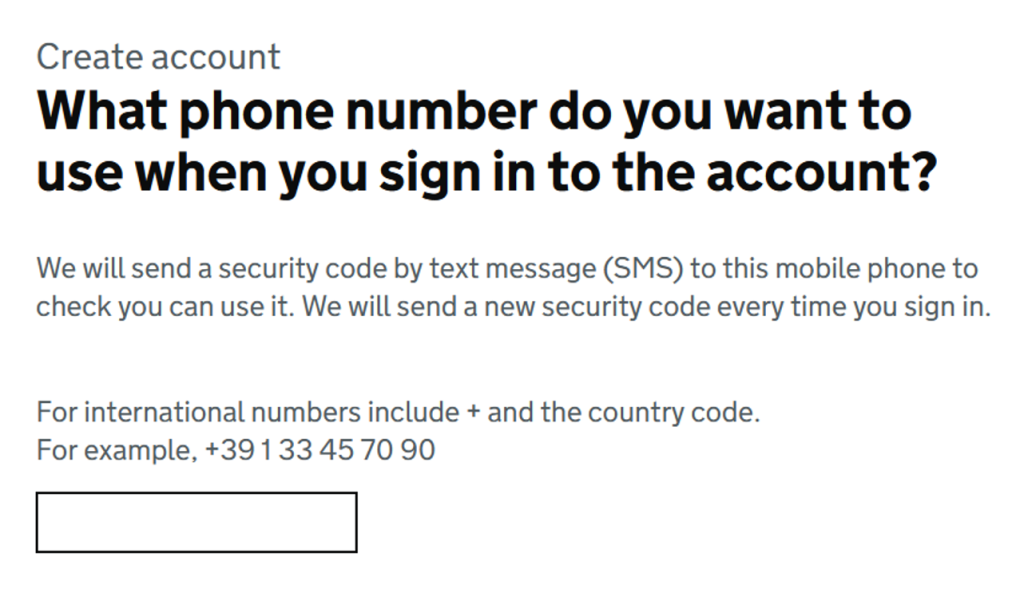
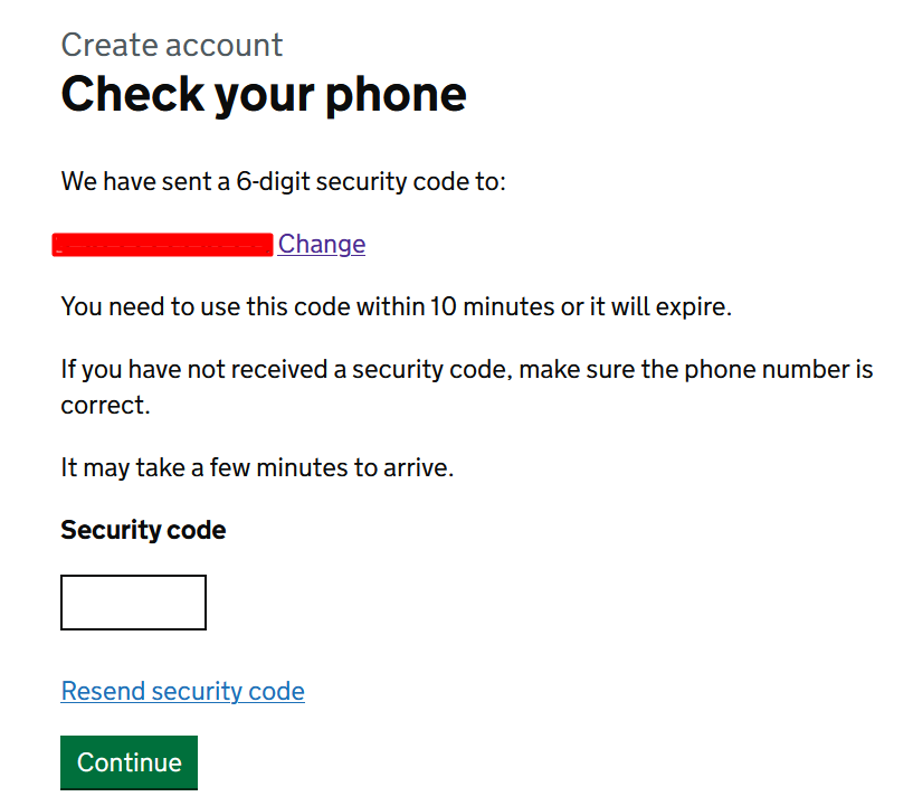
An SMS passcode will be sent to your phone. Sometimes the code may be delayed due to system congestion; in this case, you have the option to press the "My code has not arrived" button and then say "Continue without a code" to proceed without a code.
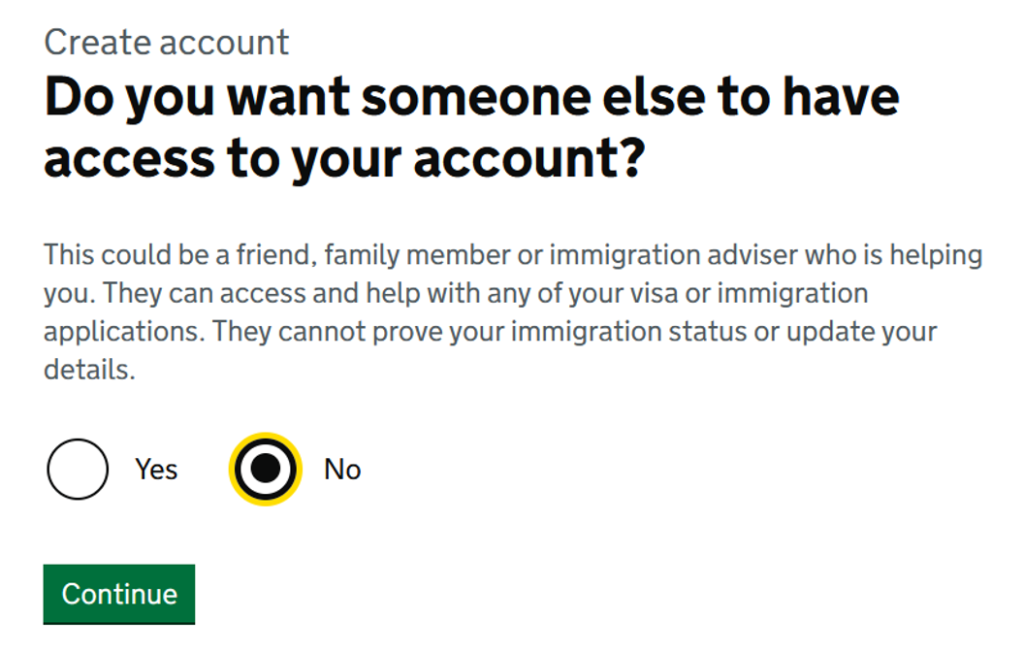
You will be asked whether you want others (family members, etc.) to have login authorization for this UKVI digital platform you created. It is generally recommended to say No to this step, as you should always retain primary control.
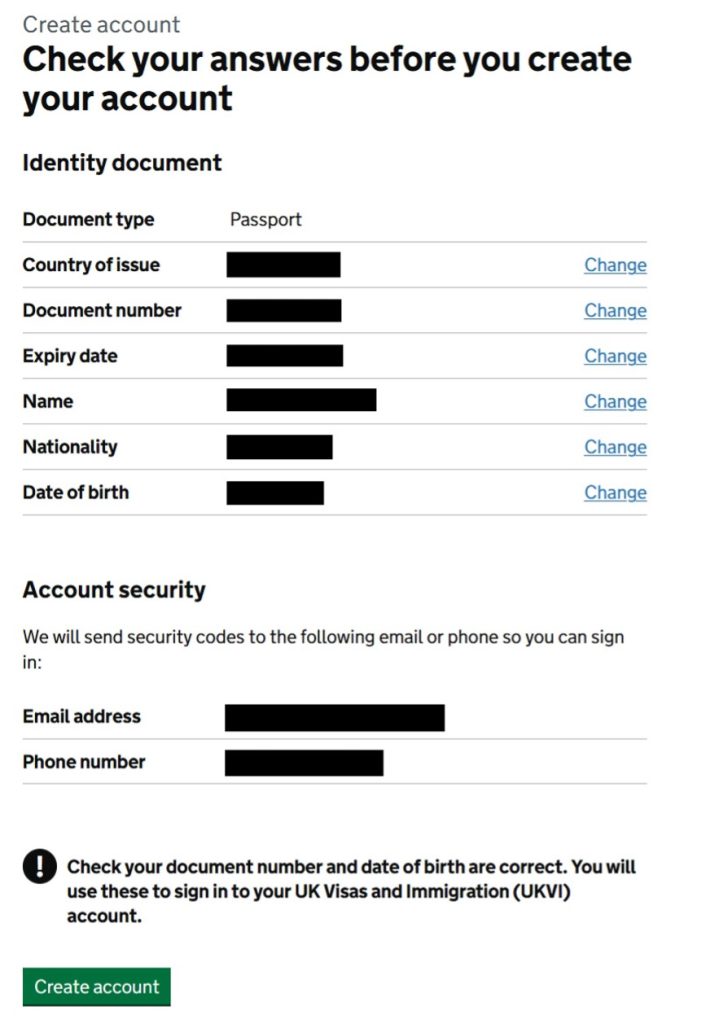
A summary page containing all the contact and identity data you have entered so far will appear. After checking, you will physically create your account by clicking the Create Account button:
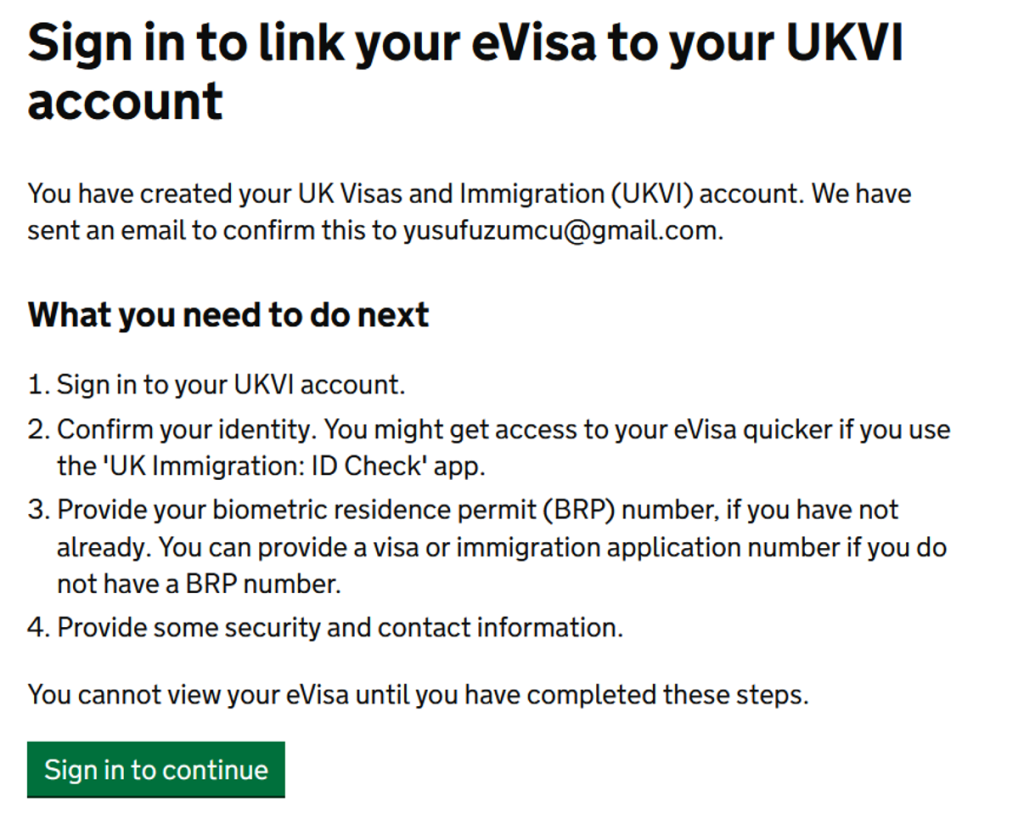
Now that we've set up the account, we will sign in. We log into the platform for the first time using the Sign in to Continue button. (Every time you log into UKVI in the future, it will be like this.)
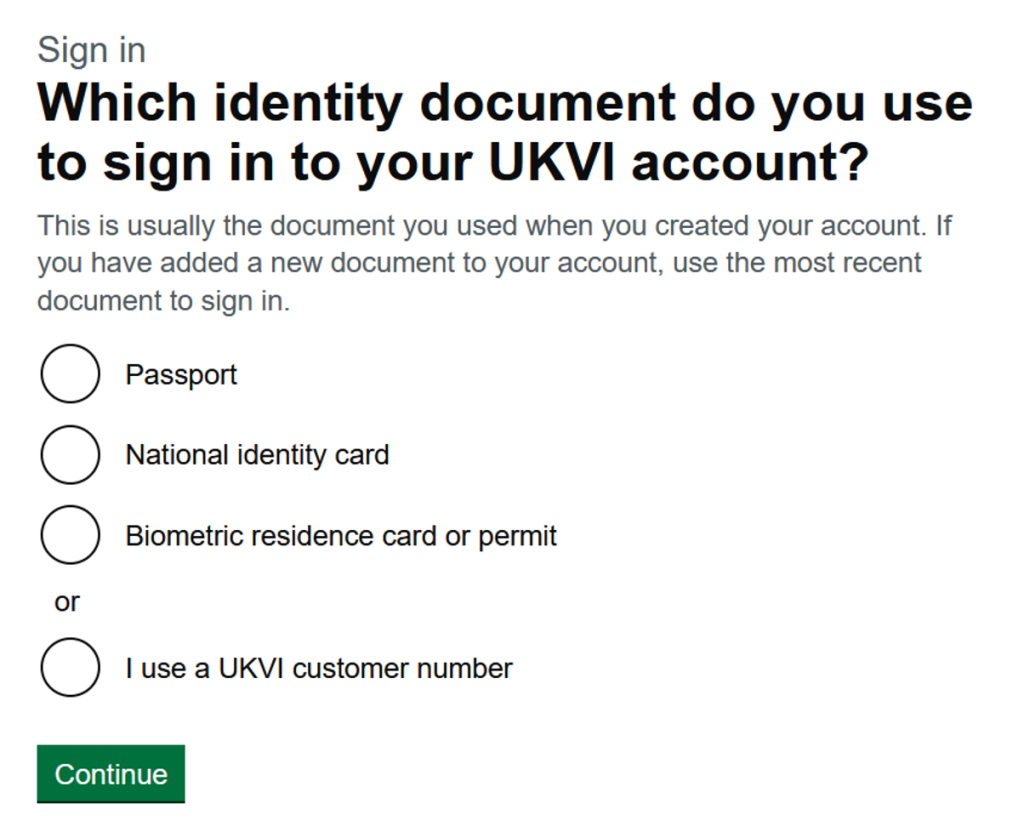
When signing in, select the Passport tab as the identity method:
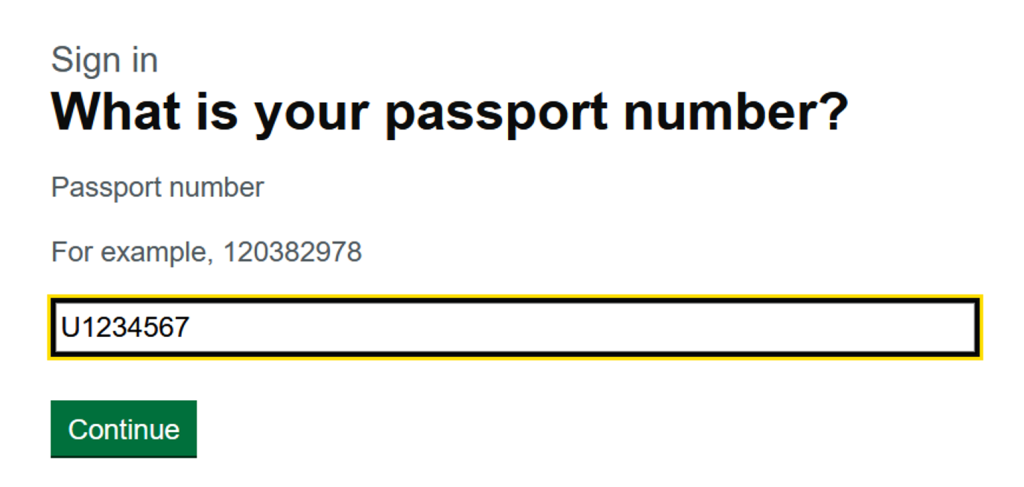
Proceed by entering your passport number that you linked to your account:
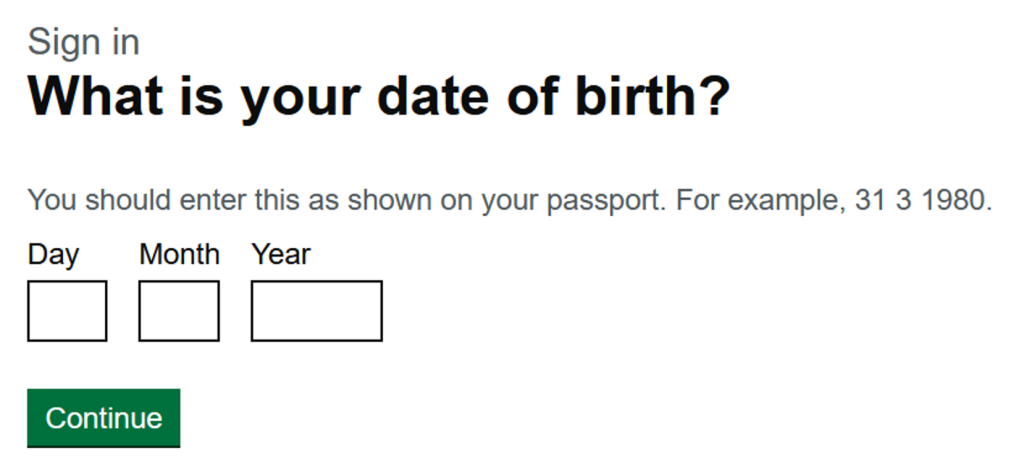
Fill in your own date of birth into the confirmation boxes again:
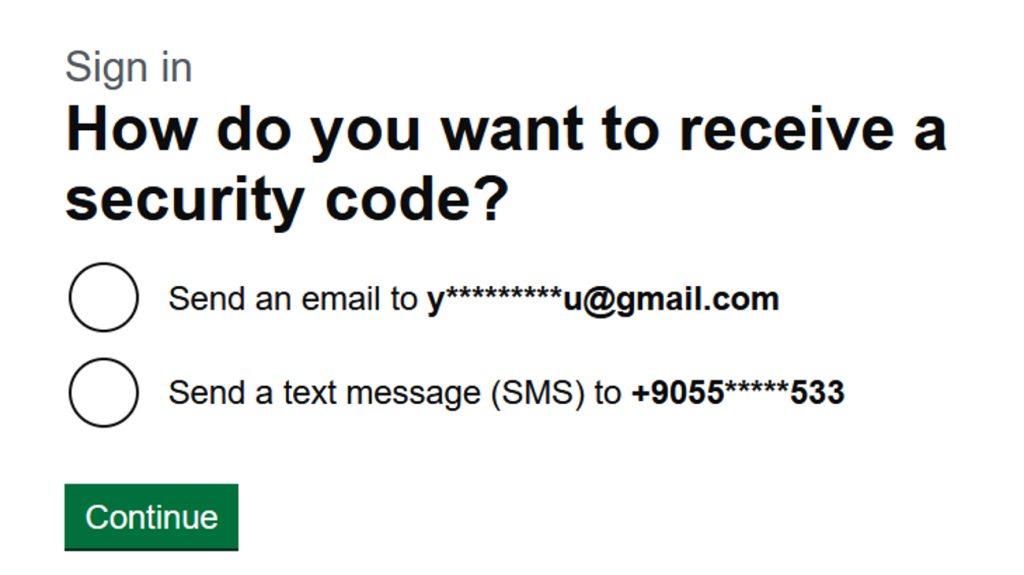
We recommend choosing to receive the code via email (Email) for login security verification, as it usually arrives much faster and more reliably than SMS:
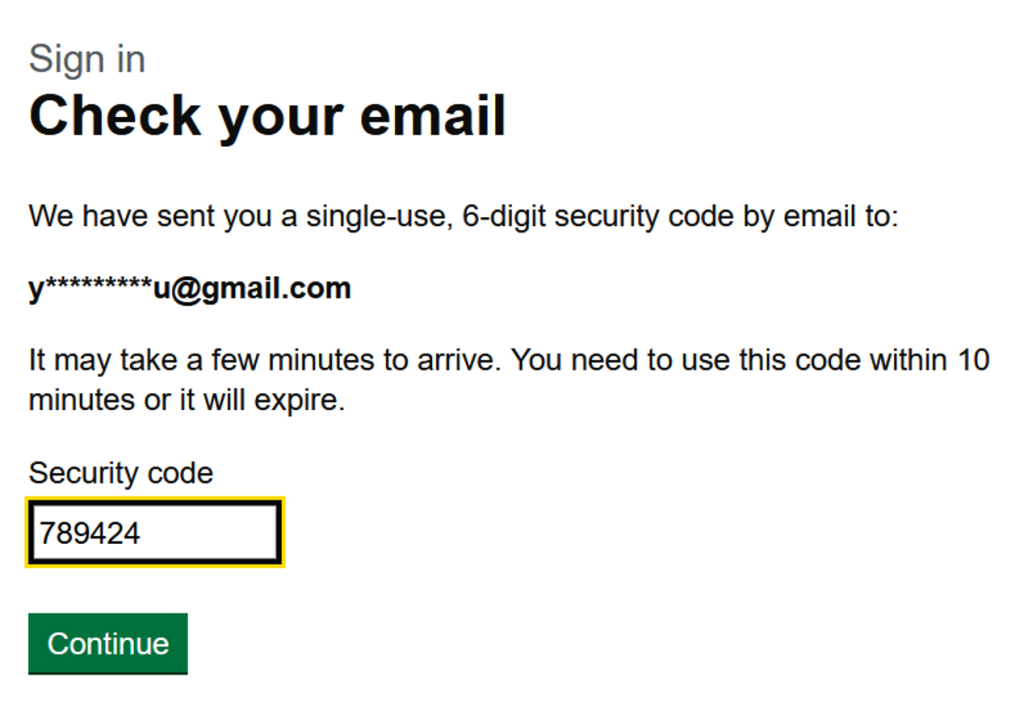
Type the current security code that will instantly arrive in your mail into the box:
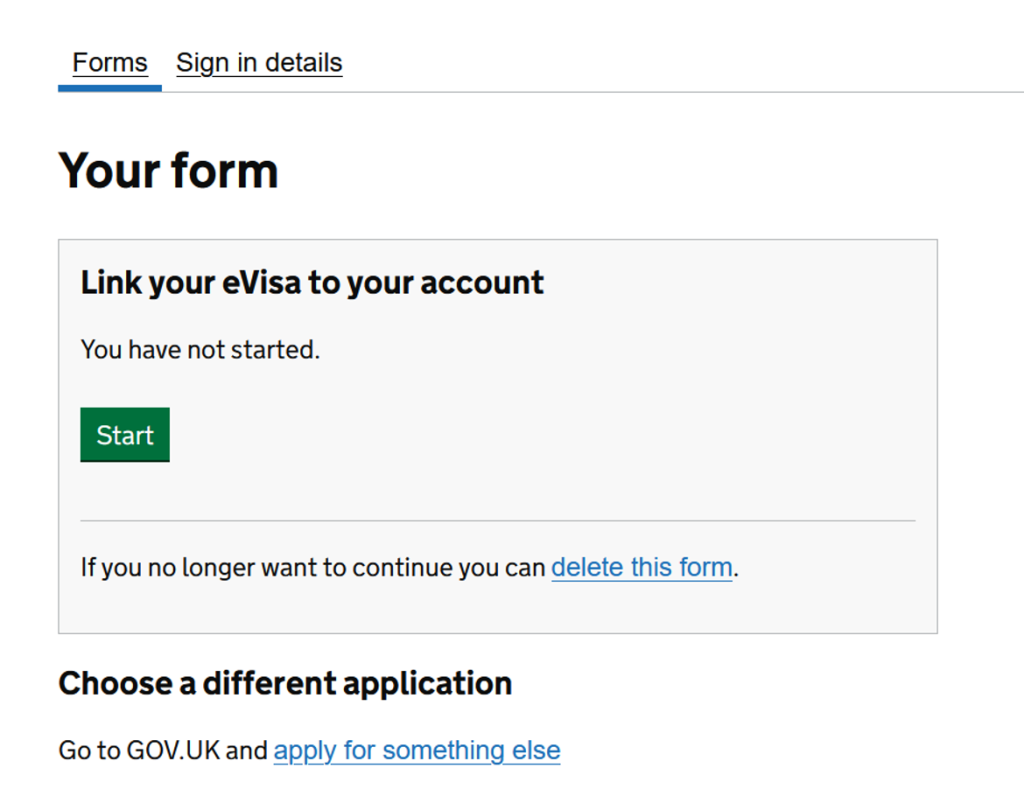
After logging in, you will transition to the "Your Form" main screen consisting of 7 basic items. First, let's move to the main stage of the procedures by clicking Start at the top:
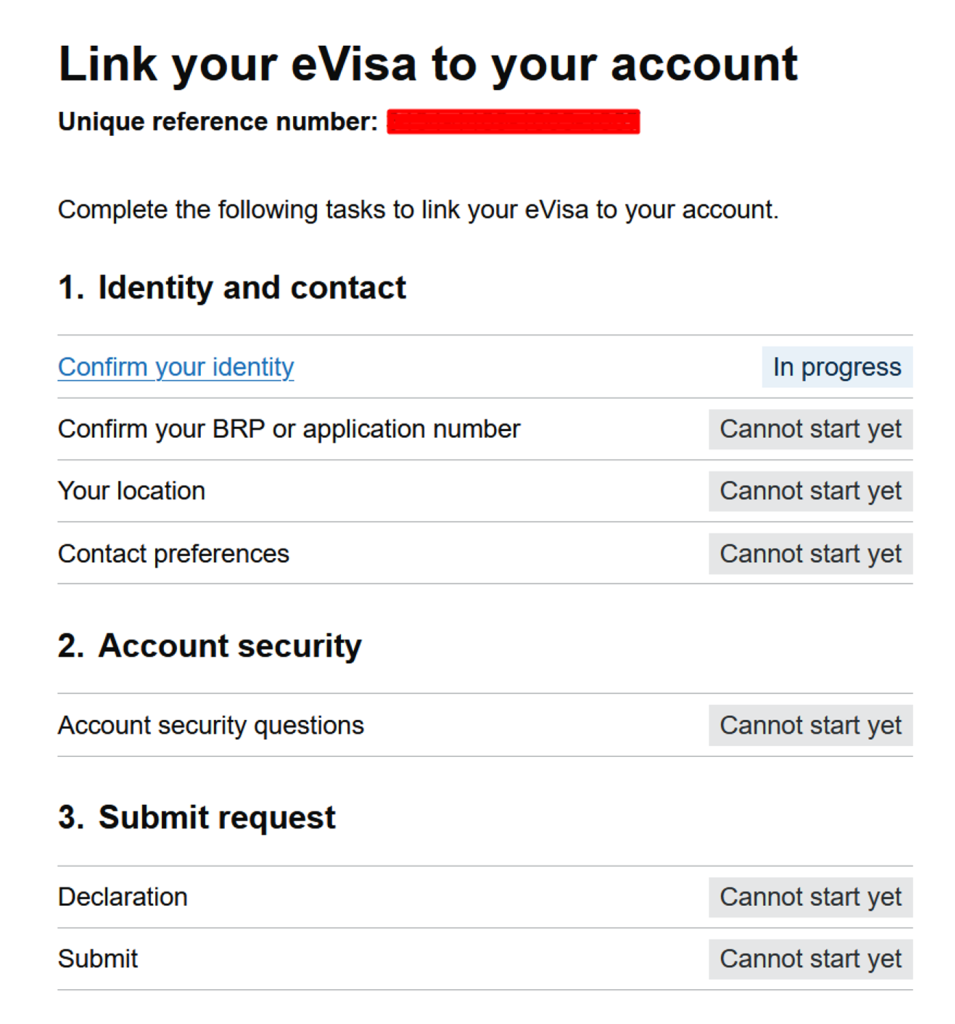
Click the Confirm Your Identity panel in the first row to activate the identity scanning process:
You are asked if your identity document, your passport, has a biometric chip. The new generation burgundy Turkish passports have chips, you can select Yes:
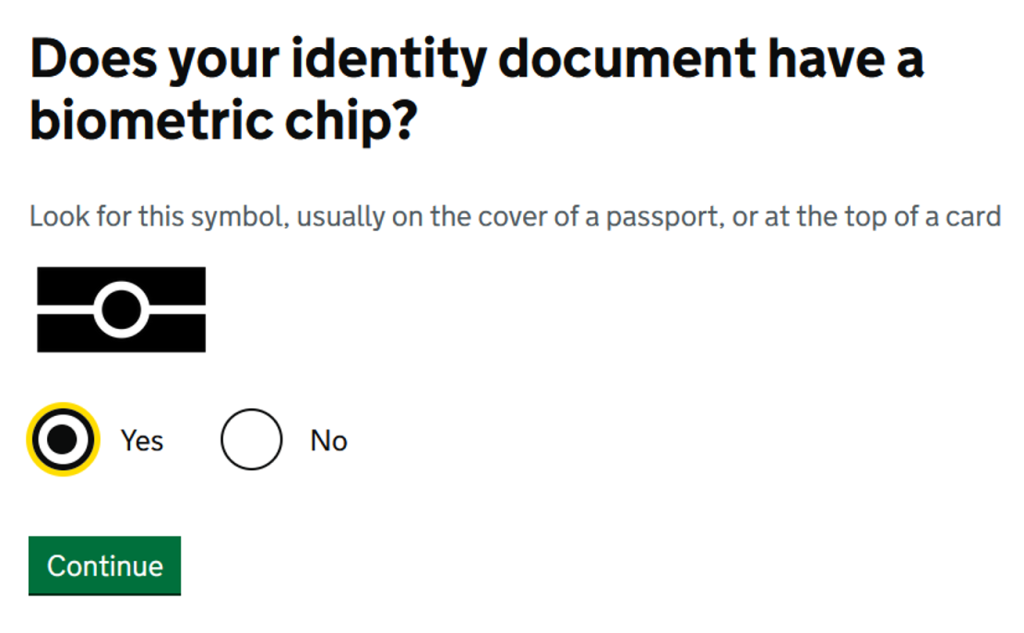
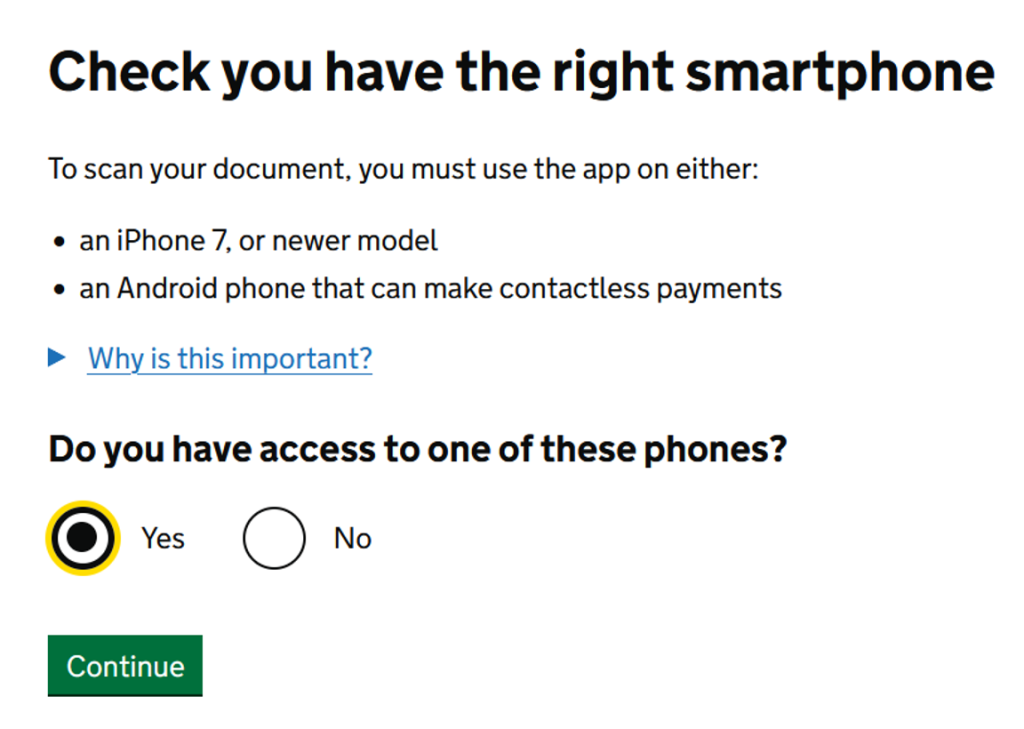
Let's declare that your smartphone in your pocket supports the application by saying Yes to device suitability and continuing:
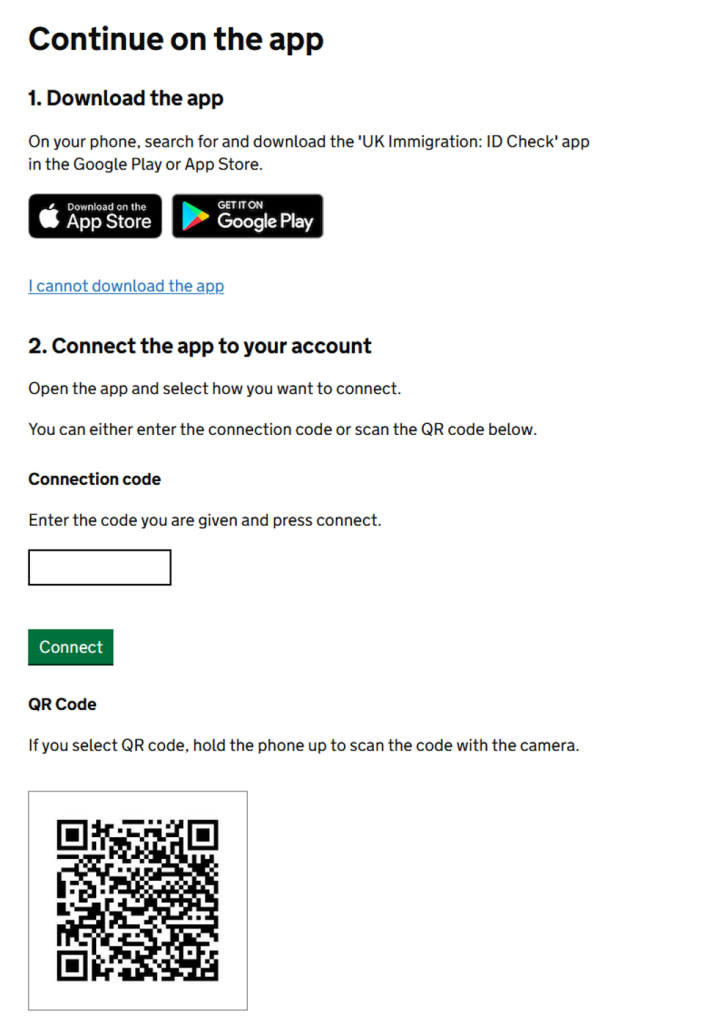
At this stage, we leave the computer for a while and switch to the smartphone. Install the UK Immigration: ID Check mobile application on your phone by either scanning the QR code on the screen with your phone's camera or searching for it directly in the stores:
ID Check Mobile Application Process
- Log into the app installed on your device and tap the Continue button.
- You will be asked which method you will use to connect the app. Select the QR Code method and scan the QR code on the computer screen. (You must allow camera access)
- It will ask for a one-time extra security code; request the code to your phone or email.
- The phrase "Connecting" will appear on the screen. Click OK on the window that pops up when verified. When this process is successful, your session on the computer will be deactivated and transferred to the phone.
- When the scanning menu appears, proceed with the International passport option as the document to be scanned.
- Take an image of your passport: Scan the page of your passport containing your personal information and photo by fitting it into the frame shown by the app.
- Access the chip in your passport: This is the most sensitive stage. Start the NFC chip scan by bringing your phone (with the case removed) close to the back/front cover of your passport. You will get a vibration alert when the chip is read.
- Scan your face / Take your photo: Holding the phone at eye level against a plain and light-colored background, perform a facial scan (looking left/right) and then take your selfie photo.
- Send your information: After seeing the scanned information on the screen one last time and confirming it, press the "Submit Information" button to send it to the UK database. Your process here is complete.
Our work on the mobile side is done! Now we can easily return to the computer and log back into our account as in step 18. When you access your profile, you will see that the "Confirm your identity" tab has changed to a Completed status. Click on the Confirm your BRP or Application Number area right below it. If you do not have any UK residence document, you can say No and continue:
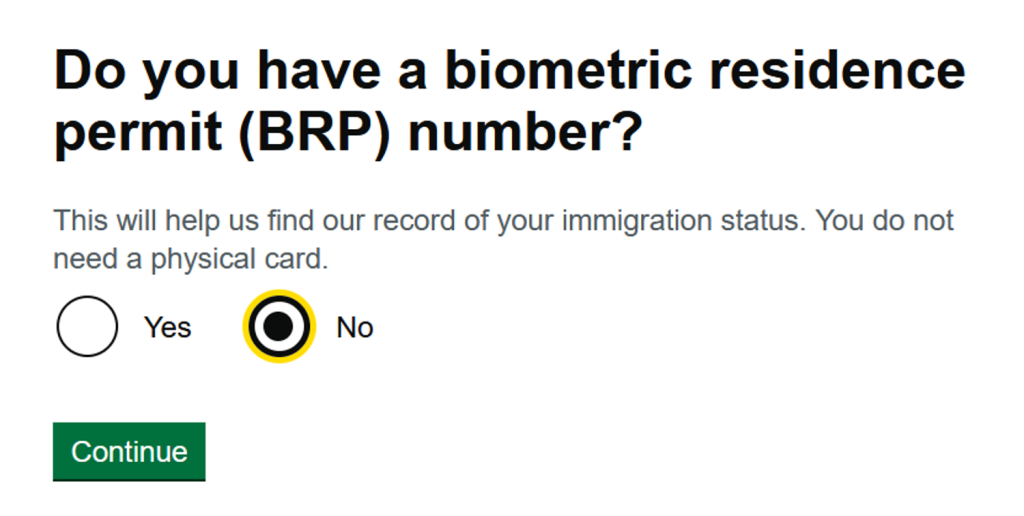
Respond with Yes to the subsequent question. This is because your official application number assigned to you, known as your GWF number, is requested here:
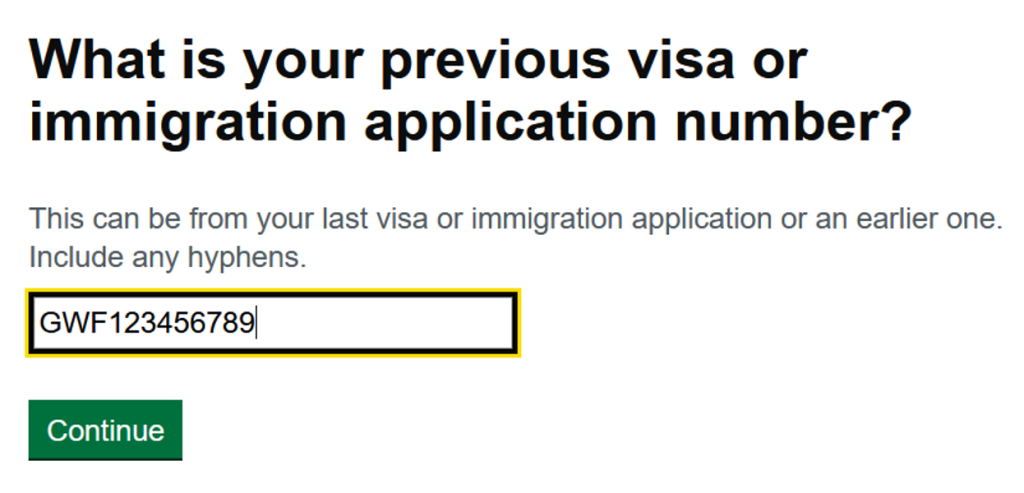
Proceed by correctly typing your unique application number, starting with the letters GWF, which can be found on your visa result document or appointment barcode:
Final Form Steps:
• Your Location: Click the "No, I am outside the UK" option to declare that you are currently outside the UK.
• Contact preferences: Check your confirmed Email address and phone number.
• Account Security Questions: Set answers to 3 specific questions you will choose to protect your account. (Make sure to note down the answers)
• Declaration: If you are an adult individual handling the procedures yourself, check the phrase "I am the person submitting..." in the first item.
When the word "Completed" appears next to all 7 items on the menu, press the Submit and "Confirm and Submit" buttons at the very end of the page. The system will give you a reference number showing that the process is being handled.
Congratulations, you have successfully completed the registration process! You will soon receive a notification message in your email titled "We are linking your eVisa to your account". This linking is done in the background by UK authorities. After the process, which usually takes from a few hours to a maximum of 24 hours, you can access your account seamlessly by clicking the direct link in the new email stating "Your eVisa has been linked".
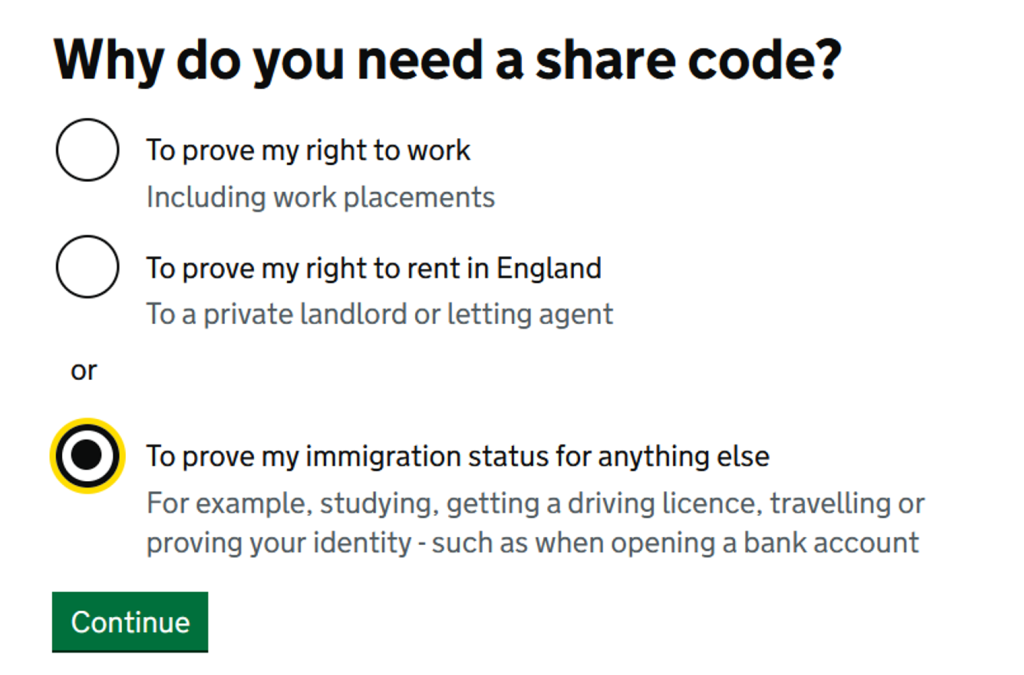
When you log into your processed profile, you will see a green-backgrounded View your eVisa and get a share code button. By pressing this button, you can see all digital data of your approved UK visa.
In order to present your visa at border police checks in airports and official inquiries, you can click the Get a share code section from the system and obtain a unique 9 alphanumeric security code using the "Create a share code" button. The validity period of the codes you receive is 3 months. You can generate a new code anytime to replace expired ones.
Download This Guide
You can save this digital application guide, where all these steps and visuals are gathered, to your device and review it anytime.
e-Kolay Vize is By Your Side in Your UK e-Visa Process
You can contact our professional e-Kolay Vize experts to avoid any problems during the UK's transition to the digital visa (e-Visa) and to smoothly pass the ID check and account linking process.